This is a new "design" for us. We managed the watering of the upside down garden very differently last year. We experienced drought conditions last year. The drought and the fact that we are expanding the garden so much this year has made us rethink our watering practices. It has always been important to us, to not waste water, we are now more conscious about water use than ever before. Along with the conservation of water, I am also working to mange my time and personal energy resources well. I am hopeful that by the end of the season, I will have a system in place for all the gardens that manages all my resources well and is very simple. Simple enough that I could easily leave the care of my garden to some one else with little explanation or worry. For the Upside Down Garden, this means integrated water reservoirs.
Stay tuned for future water saving measures, posted in future blog entries.
My Reservoir Piercing Tool

I use a "T" pin, any pin will do I'm sure, I just had these on hand and I find them easy to get a good grip on them so, I chose one as my piercing/perforating tool.

I chose one liter bottles this year because I wanted to bury them within the planters. One liter should not displace too much soil and it should give the plants enough to drink. My goal is to give them just enough to drink and to not have much drainage out the bottom. I am concerned about losing precious nutrients along with the water as it leaks thru the bottom of my planters. Since I don't rely on commercial fertilizers, this is very important to me.

I am using any plastic one liter containers I can get my hands on, soda bottles, water bottles and milk bottles, all are well cleaned and used this year.
First I pierced holes in the bottom of the containers, on this soda bottle I pierced all five areas that would be low lying once installed.
Next time, I will only pierce one hole. My goal is for the water to trickle out, five holes are just too many and the water is flowing too quickly.

also pierced a few holes in the sides, next time I will only pierce one on each of 2 sides. The water is flowing much too freely. I am hopeful that I can slow the flow in such a way that it will soak the planting soil without losing much thru the bottom.
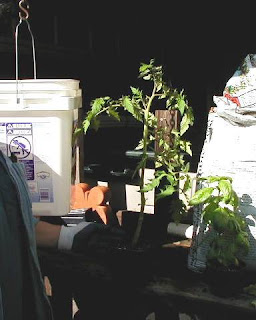
I did leave the caps on the bottles on purpose, they will be used all the time once the planters are finished. Now that the bottles are perforated, I set them inside the container, grab a couple of plants and head for the potting bench where I have a hook with a length of chain attached to hang the empty pot from .
 This is the tomato I chose, it is quite well developed so, I will prune the bottom section of the plant before I pot it.
Remove the plant from it's small pot...

Remove most of the soil, the root ball has to be small enough to fit thru the hole you made on the bottom of the pot. It will not injure the plant if a few of the roots get trimmed so, don;t worry too much.
Put one hand inside the pot to grab the root ball once it fits thru from the outside, while you gently coax the root ball and stem thru from the bottom, allowing the top of the plant to hang upside down.
 Be gentle and coax the roots thru. If you removed enough of the soil and trimmed the roots a bit (scissors can be used) it should fit thru. I always do this with seedlings, these are the largest seedlings I have ever used for the upside down planters and they fit with a little patience.
 Once you get the root ball thru the bottom, you continue to support the plant from the bottom with one hand.
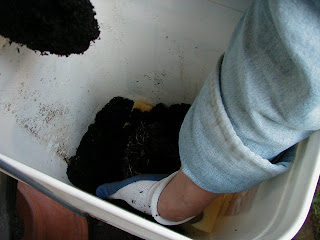
Now, while contiuing to gently support the root ball in your hand, begin to add dirt to cover the bottom of the planter with the other (unless you have a helper, which can be a very good thing!). Just cover the bottom with a few inches of soil, don't tamp the soil down, you want it to remain rather loose and airy at this point, it will all settle in naturally around the plant, it's roots etc. Make sure to put in enough soil to support the plant enough that you can let go of it and not so high that it gets in the way of placing the next plant in thru the side hole.

This is just another picture of my gloved hand supporting the root ball, taken from another angle, I think it is very hard to see what is going on inside the bucket at this point. I hope offering a second picture, from a different angle might help.
 Next set the resevoir into the bucket, on top of the dirt. Make sure the top of the bottle is above the top of the bucket, you want the shoulder of the bottle exposed a bit (not much) so you can see the water level when you fill it. You may have to dig down a bit to place it correctly, just be careful, use your hand so you don't damage the plant(s) at all.
Now begin to fill with your soil around the bottle, filling up the bucket to near the very top. Please remember to not tamp down the soil, let it settle on it's own, just fill for now.

 Here is a bucket I consider full, I can still see thru the shoulders of the bottle when I fill it with water. After filling it with water, I replace the cap. I hope this will slow the flow of the water from the filled bottle.
Finally, there is one pot, with an upside down tomato plant, hanging upside down, in my Upside Down Garden!
Stay tuned for, PART III

1 comment:
very nice joey
i want to come live by you......
vi
Post a Comment